JetSmartFilters looks through Meta Fields to set up clickable and customizable filters for your website’s search options. BuddyBoss‘s Meta Fields, however, are not typical fields, and as such JetSmartFilters couldn’t make use of them, until now.
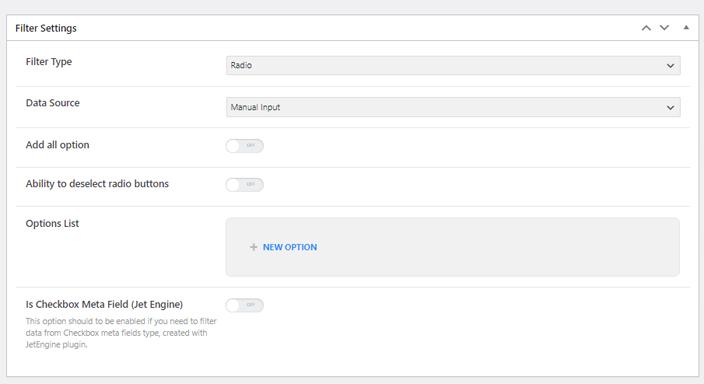
Go to your Filter settings in your WordPress Dashboard and create the new filter you need.

Set the filter type, set the Data Source to Manual, and add the values you need according to your BuddyBoss profile types. You can easily check these in your Dashboard by visiting your Profile Fields page in the BuddyBoss Components Dashboard page.

With that done, insert the related BuddyBoss Field ID, into the Query Variable field at the bottom of the page. The Query Variable to insert depends on the selected Filter Type:
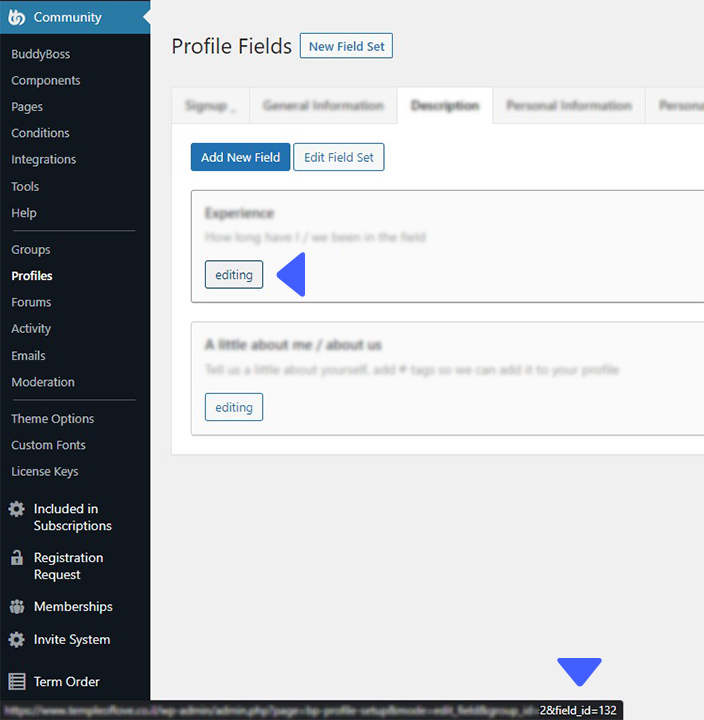
Where “xx” needs to be replaced by the BuddyBoss Meta Field ID you’re trying to use as a filter. To check which ID you need, find the field by navigating to the BuddyBoss Dashboard, and head to Profiles. Once there, select the Field you want to use, and hover on Editing. While hovering, a preview of the URL will appear on the bottom left of your browser page. There you will find the ID at the end of the link, as shown in the screenshot below.

Save, and JetSmartFilters will know to look through this Meta Field as well.

Looking for a lifetime deal?