Three.js is a cross-browser JavaScript library API used to display animated 3D computer graphics in a web browser using WebGL. It’s an extremely powerful tool, but completely inaccessible to non-developers and non-3d artists. That changes thanks to Gloo’s 3D Model Widget. Now, the only knowledge required is the ability to use the Elementor editor.
The 3D Model Widget will allow us to upload GLB and GLTF files, even files containing animations, and change values like Camera settings, 3D Object settings, Lighting settings, Animation settings, User interaction, and even Sequence Scene settings in order to integrate the 3D Model Widget with Gloo’s GSAP feature, which will let us change the values in the settings according to the scrolling position of the page. Simply drop the Widget inside a Container and we can get started.
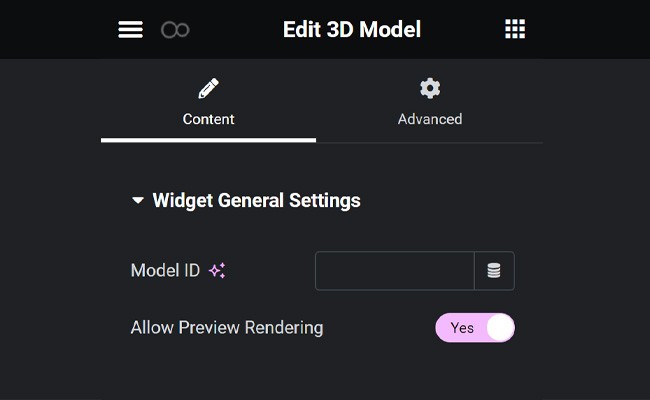
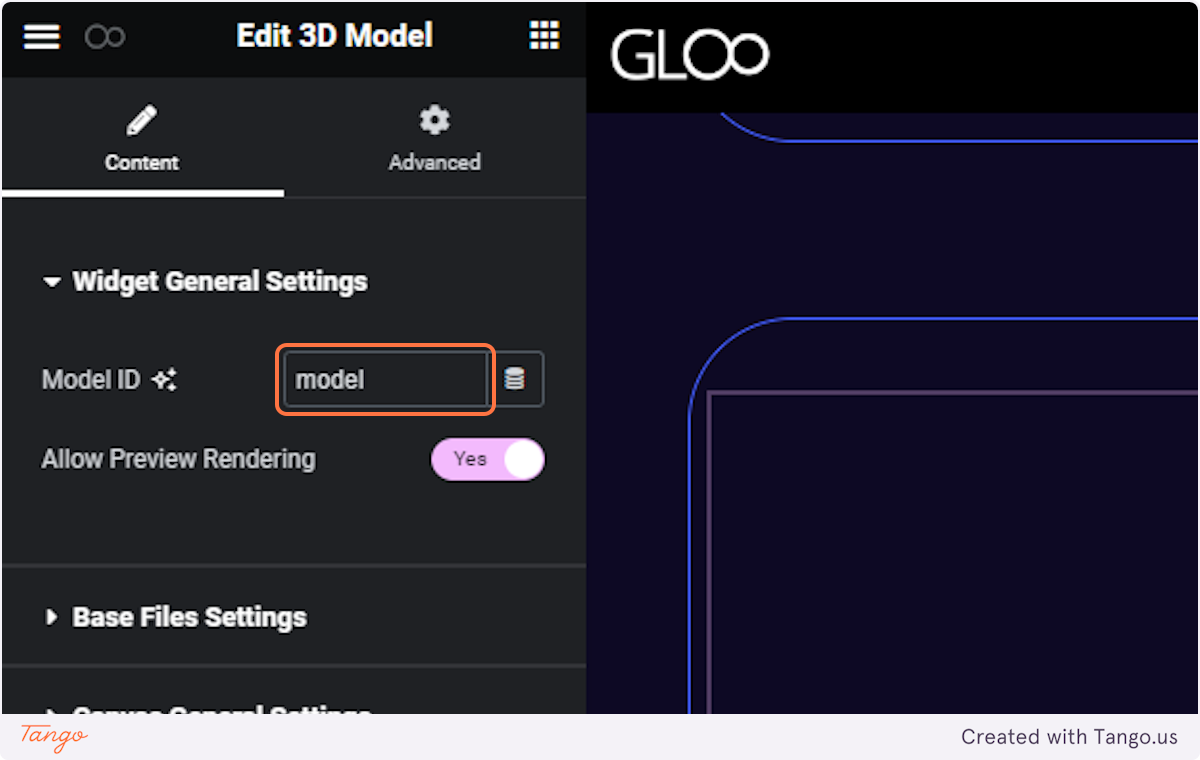
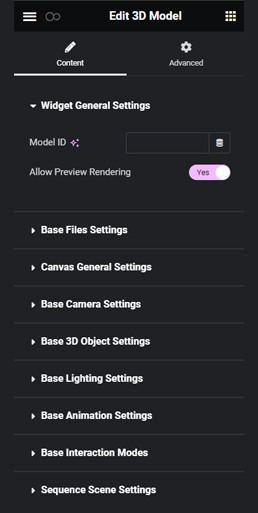
The General Settings will let us assign an ID to the 3D model(s) we’re going to be working with. By toggling on “Allow Preview Rendering” we’ll be able to see the changes in settings reflected on the model directly within the Elementor editor. We’d want to turn this off when working on other sections as sometimes the 3d rendering might make the editor slower than we want.
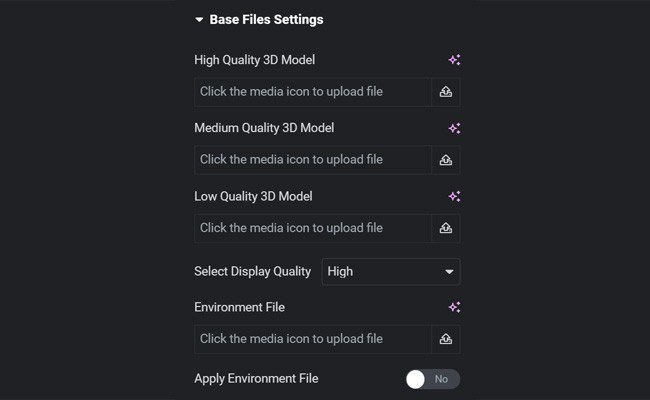
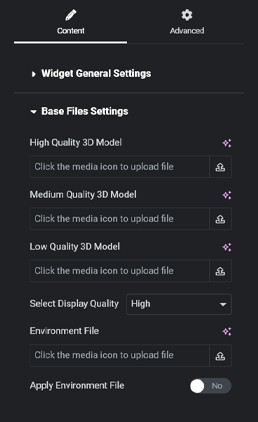
Here we’ll be able to upload different files for High, Medium and Low quality variations of the same 3D Object, and select the preferred Display Quality according to needs. At least one of them is mandatory, as that’s the main field where the Widget will get the 3D Object from. We can upload a separate Environment file for background and reflections, and apply that file with the special toggle.
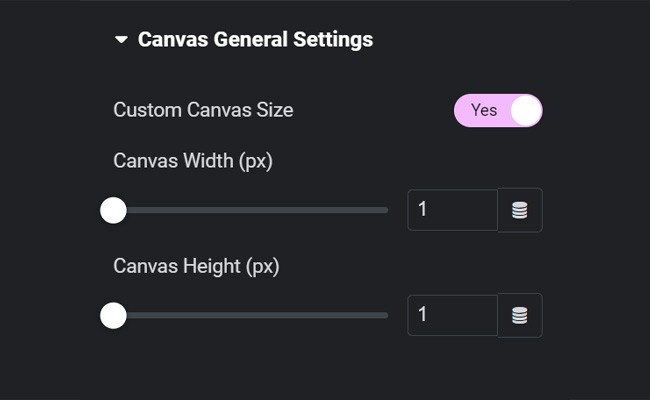
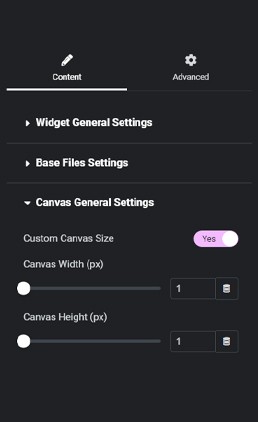
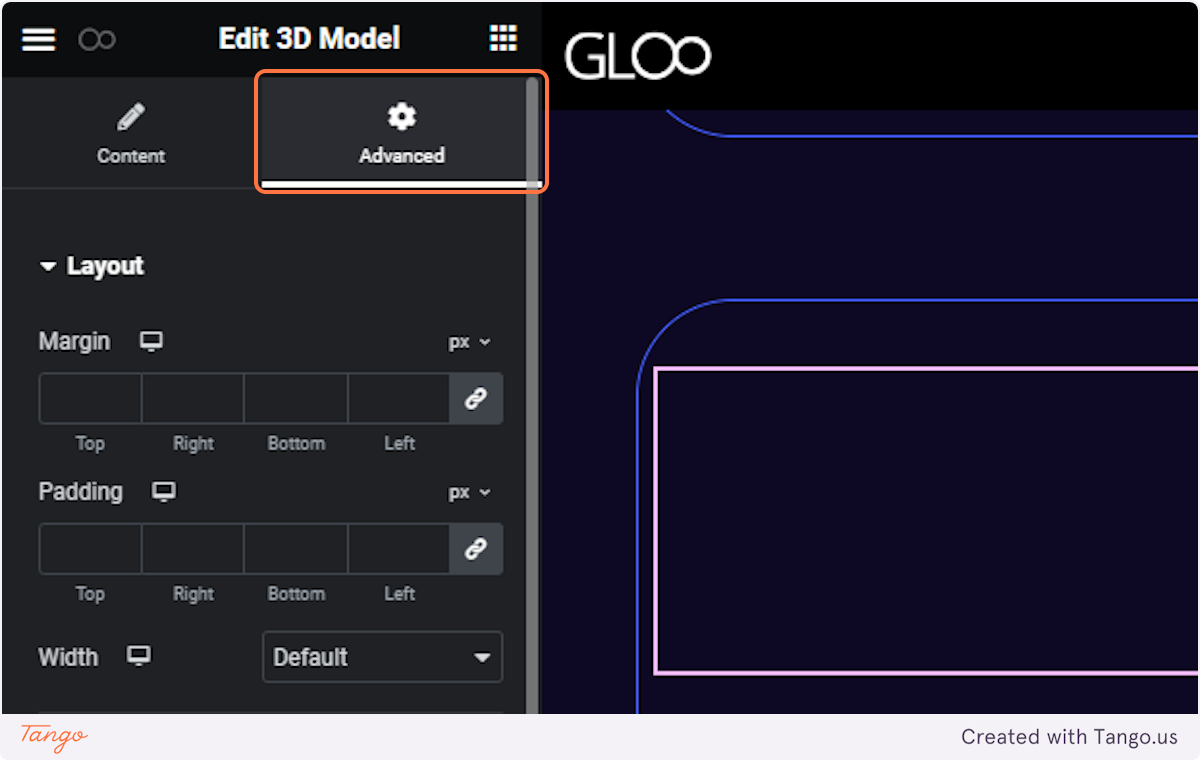
When using the 3D Model Widget inside a complex Elementor page design, we might have issues with overlap or the 3D Object taking more or less space than required. To avoid this we can set a custom canvas size for the Widget, as the Container Layout settings will not work on the Widget as well.
The Start and End fields need two values each to work properly. For example: Start at top top and End at bottom bottom. With either or both value being able to be replaced by any number expressed in percentage, for example 50%, or any other position, for example center.
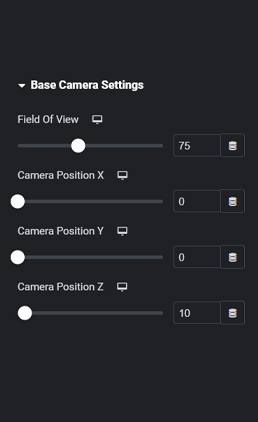
Here we’ll find the settings for the 3D Camera which will define the default view of the 3D Object.
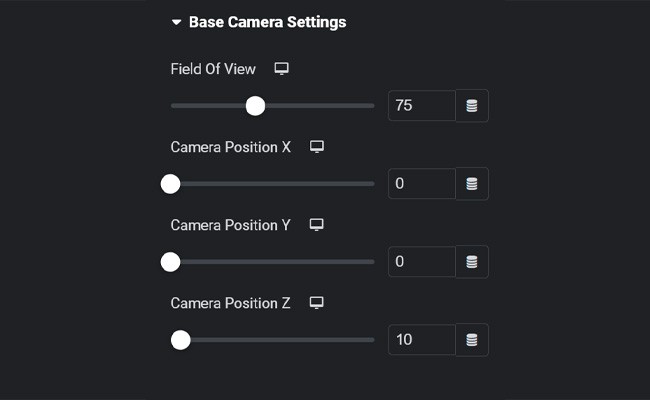
This slider sets the Field Of View for the model, which is the Object’s viewable angle from the camera.
This slider changes the X-axis (horizontal) position of the 3D camera.
This slider changes the Y-axis (vertical) position of the 3D camera.
This slider changes the Z-axis (depth) position of the 3D camera.
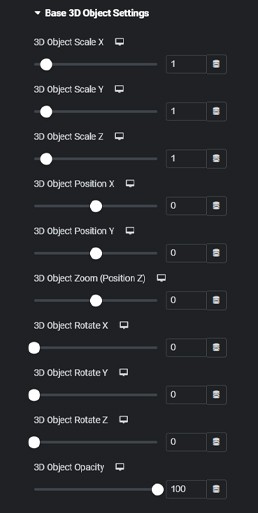
Here we’ll find basic settings for the 3D Object such as Scale, Position, Zoom, Rotation and Opacity.
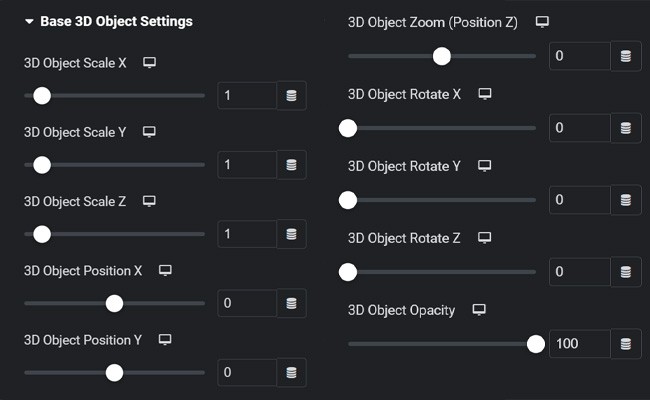
Three sliders to change the overall scale of the Object. The sliders aren’t linked so to keep the proportions, the same value needs to be in all three sliders.
A slider for each positional axis.
A further control for the Z position that will act as zoom.
A slider for each rotational axis.
Sets the overall object opacity. Being a setting for 3D objects, half-values like for example 50 will show the back of the object through the front.
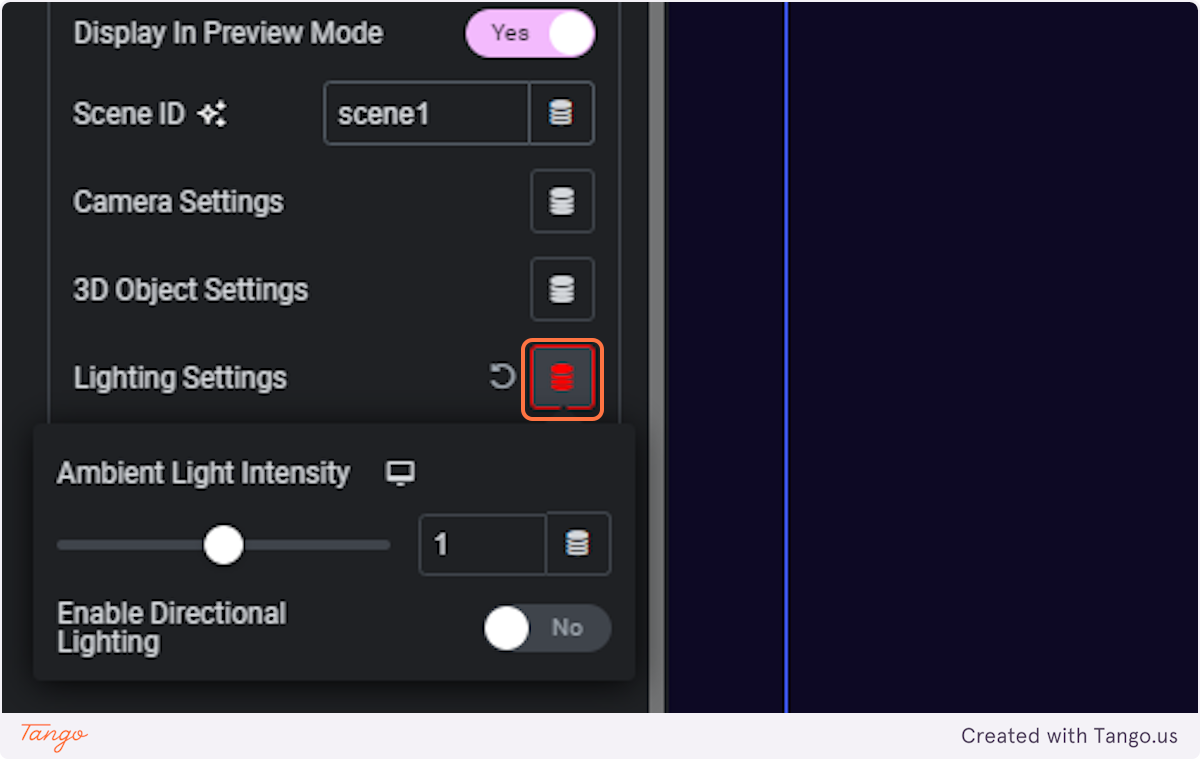
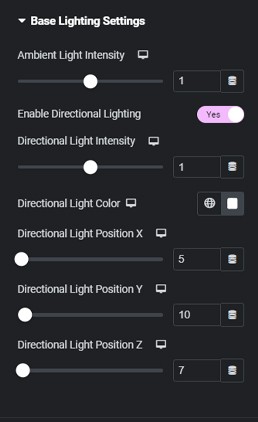
This menu will let us set the Lighting values for our 3D Object. These range from Ambient Light to Directional Lighting.
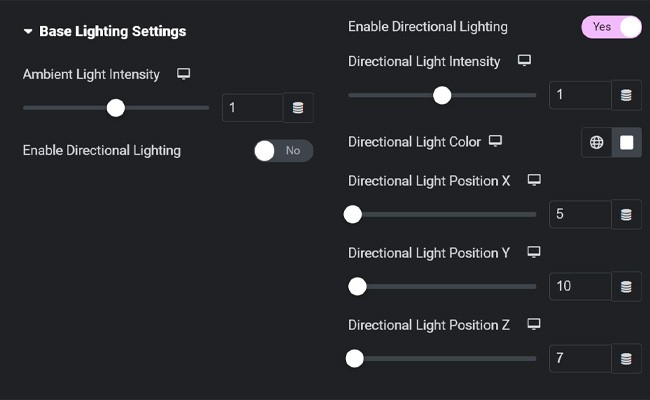
Ambient Light is light that is present all around the Object and as such produces no shadows or highlights. Its main use in this application is to set the overall brightness and visibility for the 3D Object before we set up the Directional Lighting.
By enabling Directional Lighting, we’ll have further options available which will let us setup the perfect lighting for our object in a more realistic manner.
Lets us set the overall intensity of the directional light.
The color of the light source.
A slider for each positional axis for the light source of the directional light.
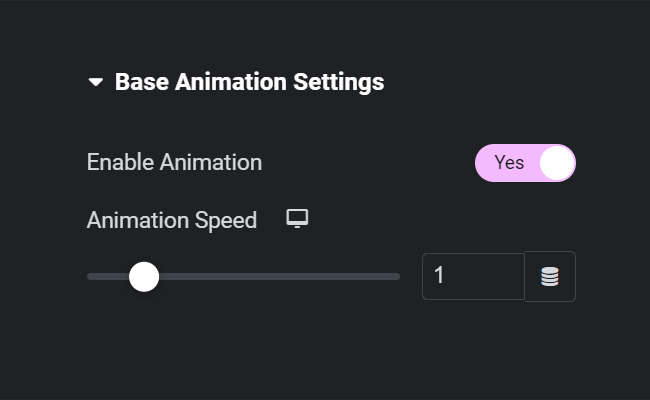
Some GLB and GLTF files come with animations packaged within the single 3D file. The Base Animation Settings will let us enable that animation, and set its speed. If we plan to connect the animation to GSAP so that the animation only plays as the page is scrolling, we will have to toggle this off and toggle it back on in the individual Scene settings, which we’ll see later.
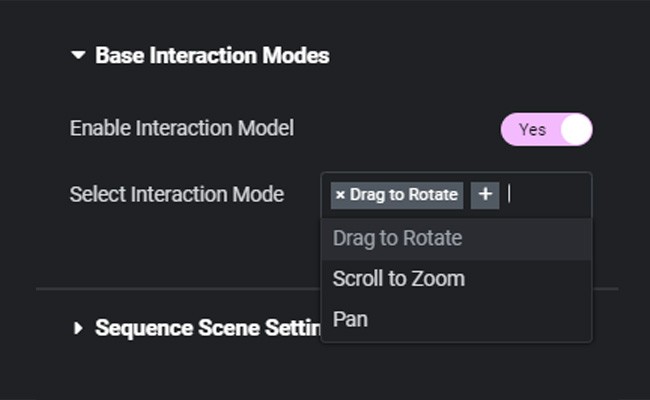
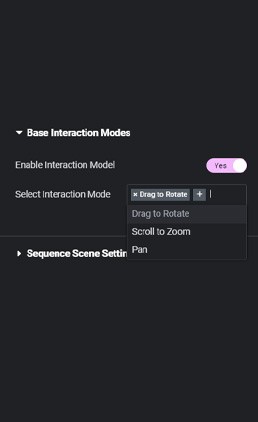
This will let us set ways the User can interact with the 3D model view. After toggling Enable Interaction Model on there will be three options which represent the ways users can interact with the object in the 3D view: Drag to Rotate, Scroll to Zoom and Pan.
It’s important to note that if we’re using the 3D Model Widget along with the GSAP feature, you may want to toggle off Enable Interaction Model, so that only the GSAP scrolltrigger animation will control the interactions. Though, if you want your users to be able to move the object as it animates, this isn’t necessary.
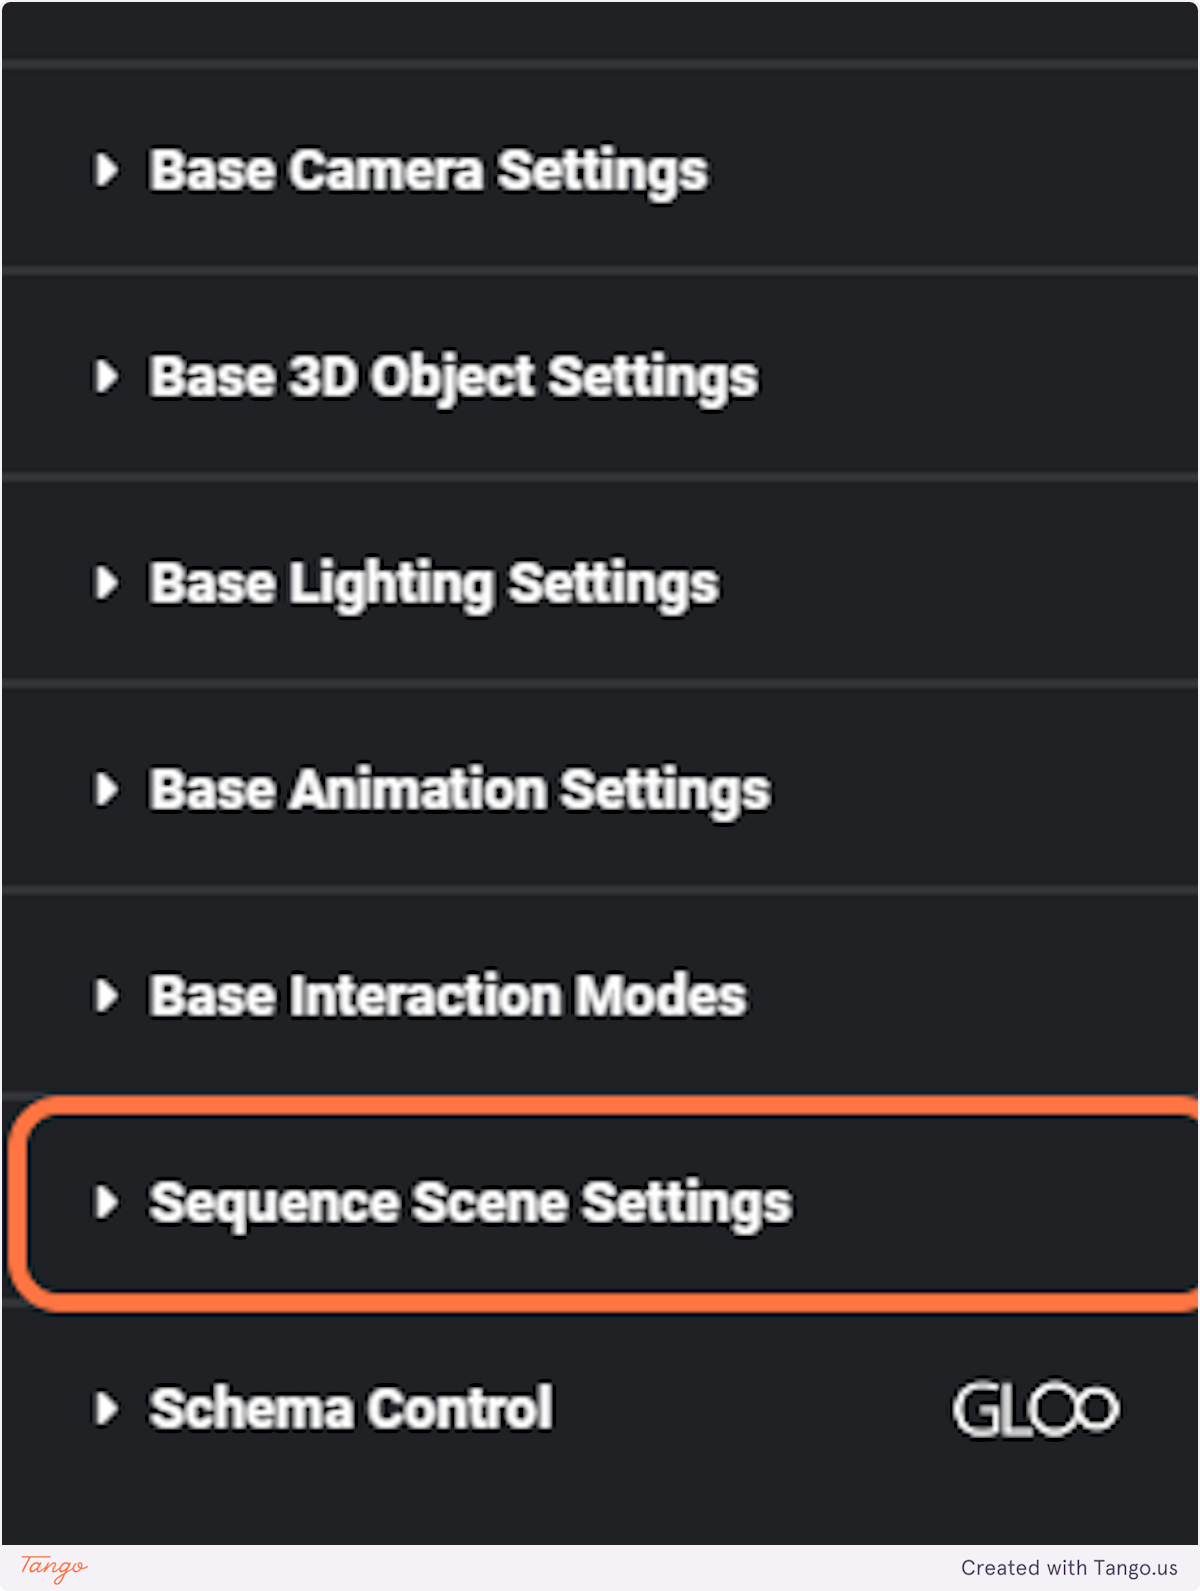
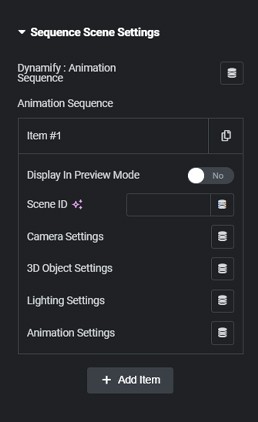
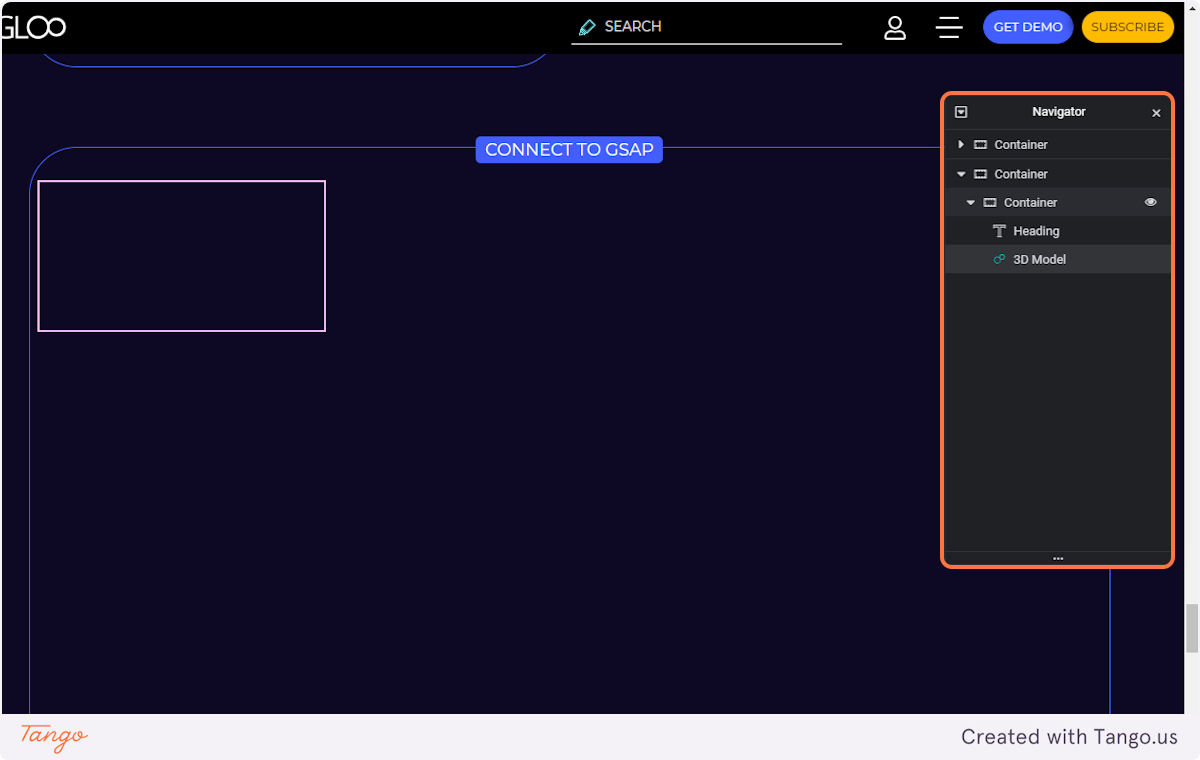
In order to control 3D interactions using GSAP scrolltrigger animations, we’ll need to setup a new scene. The option to do this is found in the last settings submenu in the 3D Model Widget Content tab: Sequence Scene Settings.
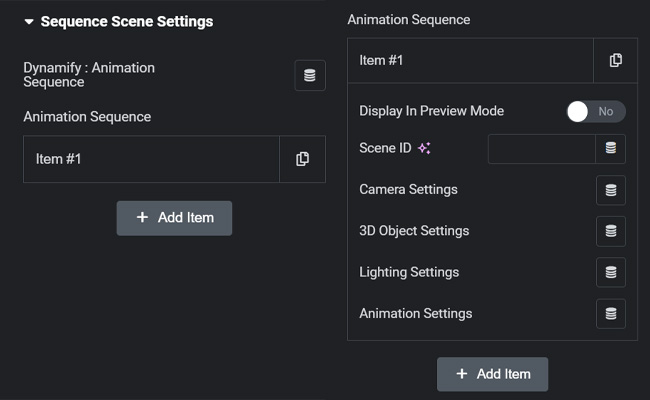
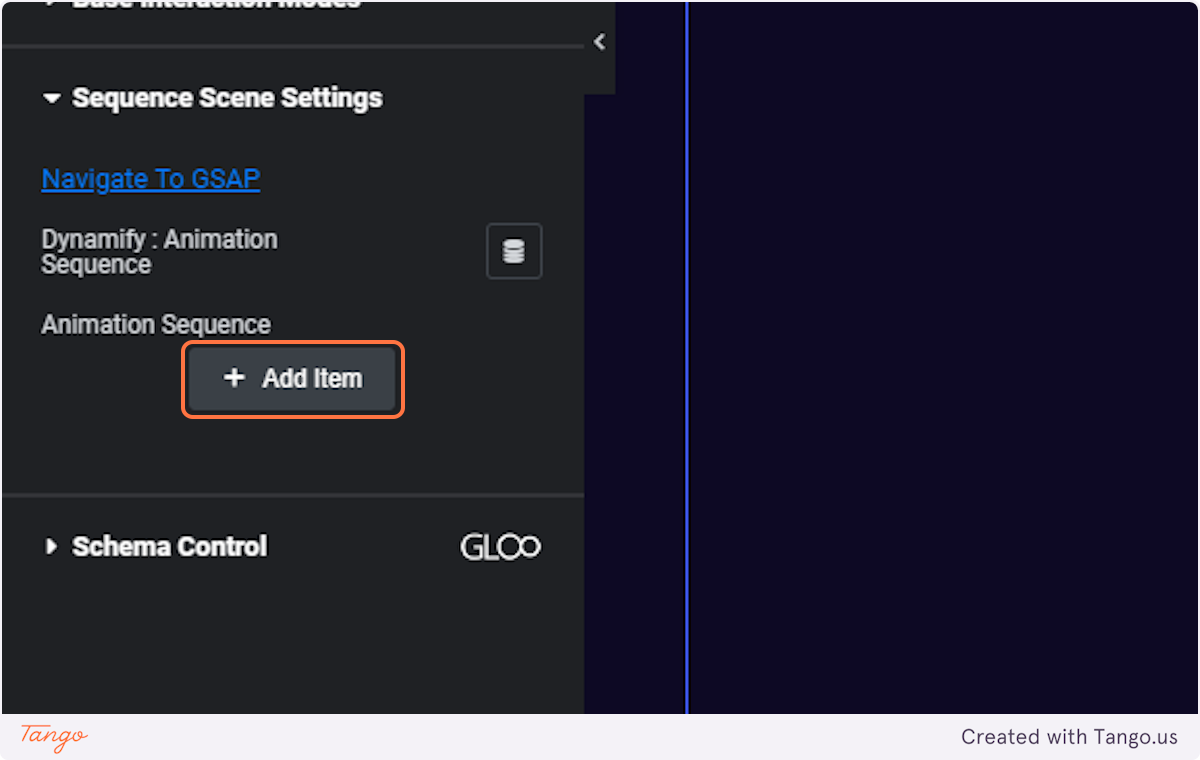
We can add as many items in the Animation Sequence as we’d like using the repeater.
This will allow us to set up as many animation steps in the GSAP animation as there are scenes.
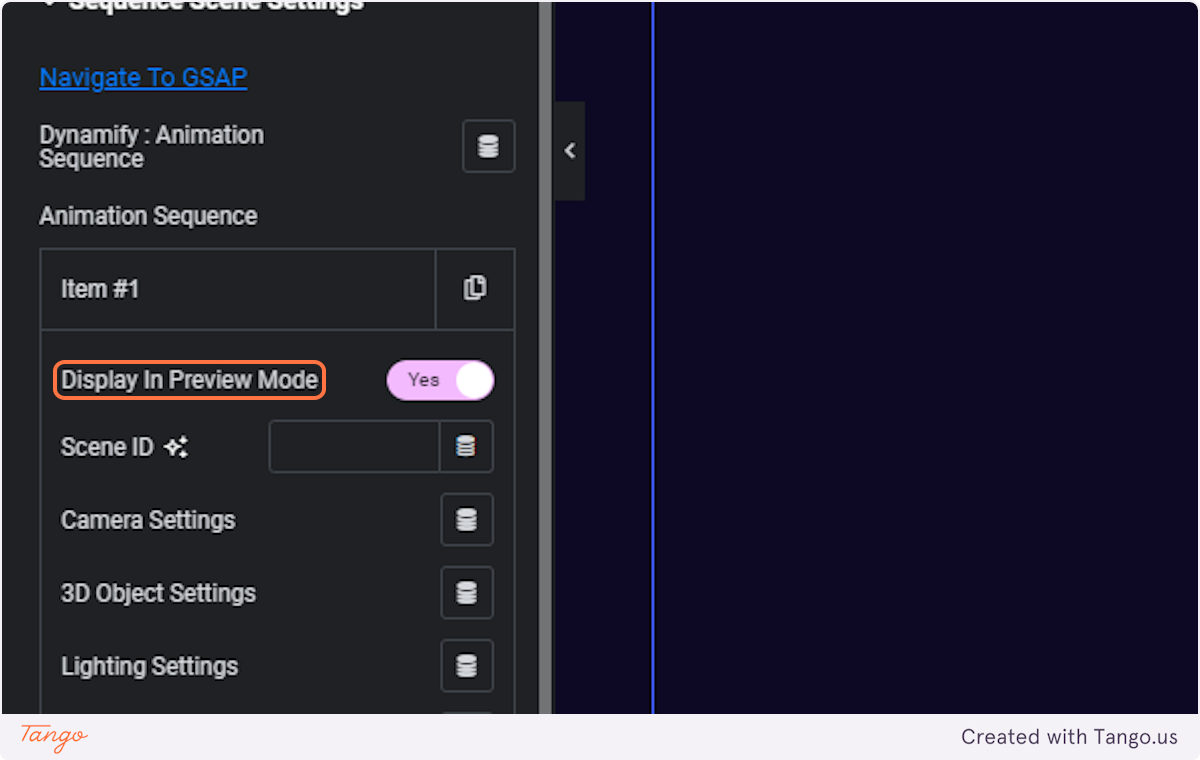
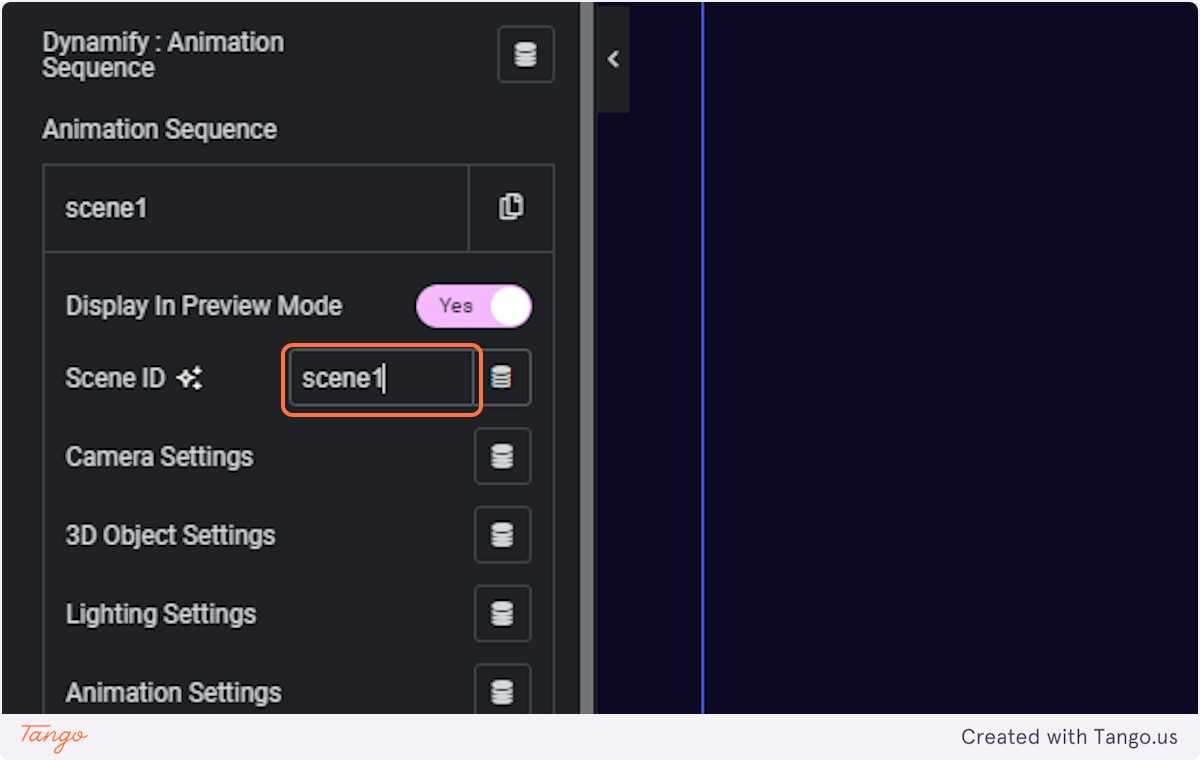
It’s important to give our new Scenes an ID in the Scene ID field. Moving forward, we’ll refer to a single example scene called Scene 1.
We will then see that within Scene 1 we have access to all the same settings we’ve seen before except for the Interaction Modes. Display In Preview Mode will let us preview the changes we make to these settings in the Elementor editor. By toggling this on and off we can directly see the changes we’ve made to the model in the Scene settings compared to the base settings we’ve set beforehand. We can change all or some of the values. The unchanged values will fall back to the base values in case they’re not modified.
In animation terms, we can say that the base values and the Scene 1 values represent keyframes, with the base values as a starting point to our animation, and each starting value will then, according to the GSAP parameters, eventually reach the values in the Scene 1 settings.
A more in-depth overview for each GSAP setting and value can be found in the GSAP Scrolltrigger Module Page.
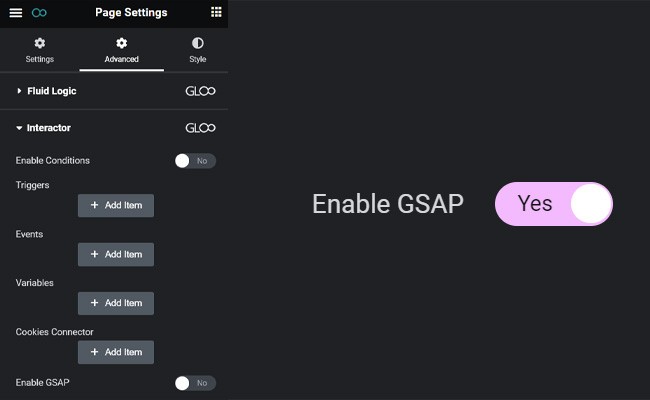
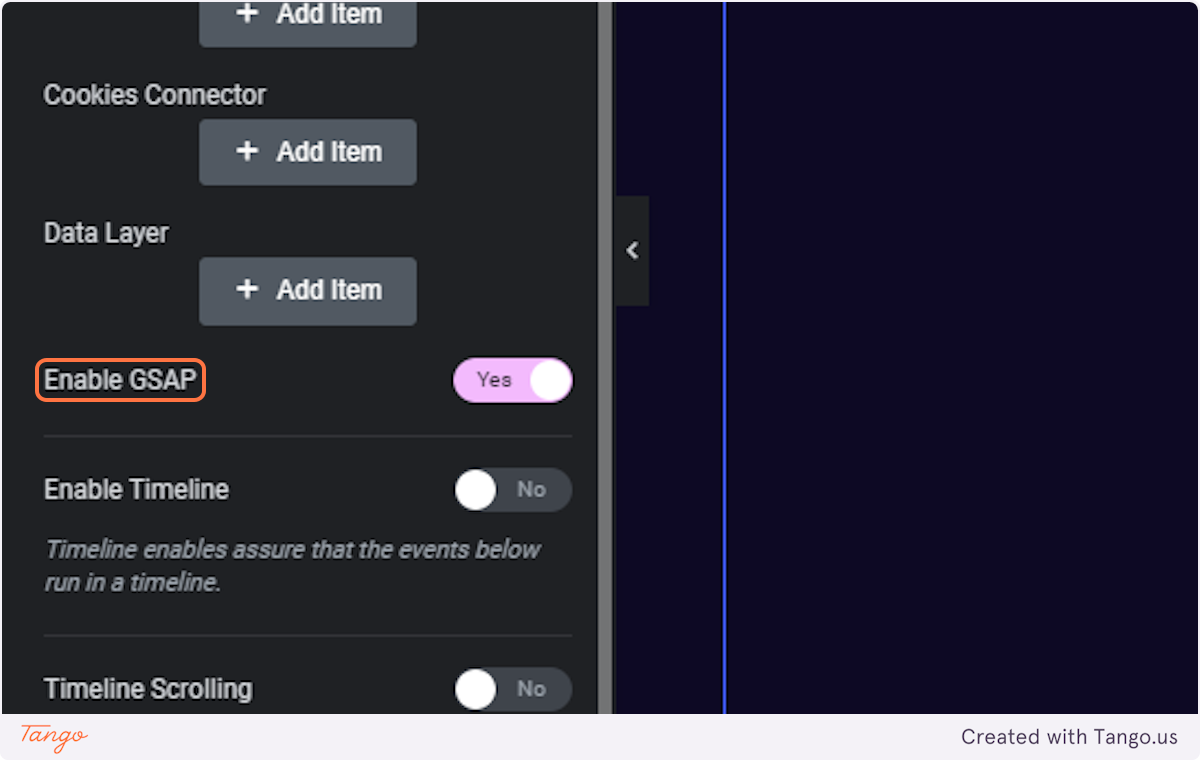
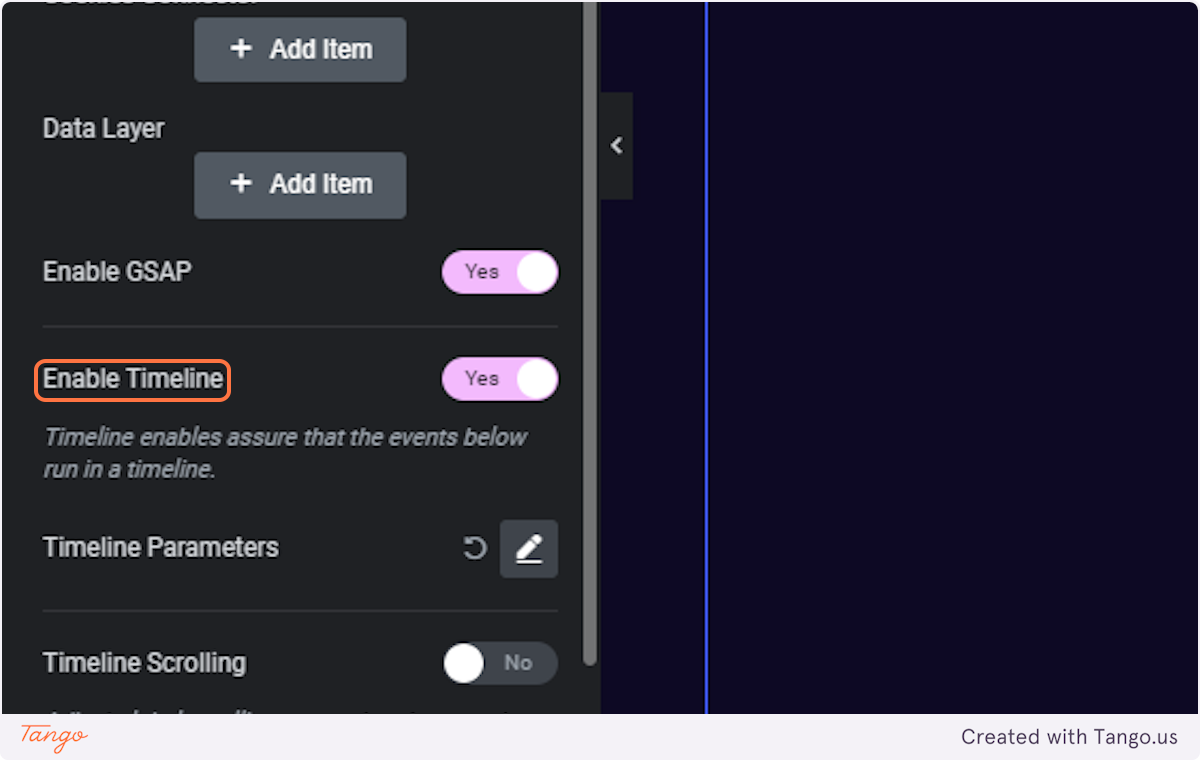
Make sure both Interactor and GSAP are toggled on in the Gloo settings dashboard. In the Elementor editor, we can toggle on GSAP by going to the Page Settings and finding the toggle inside the Interactor menu.
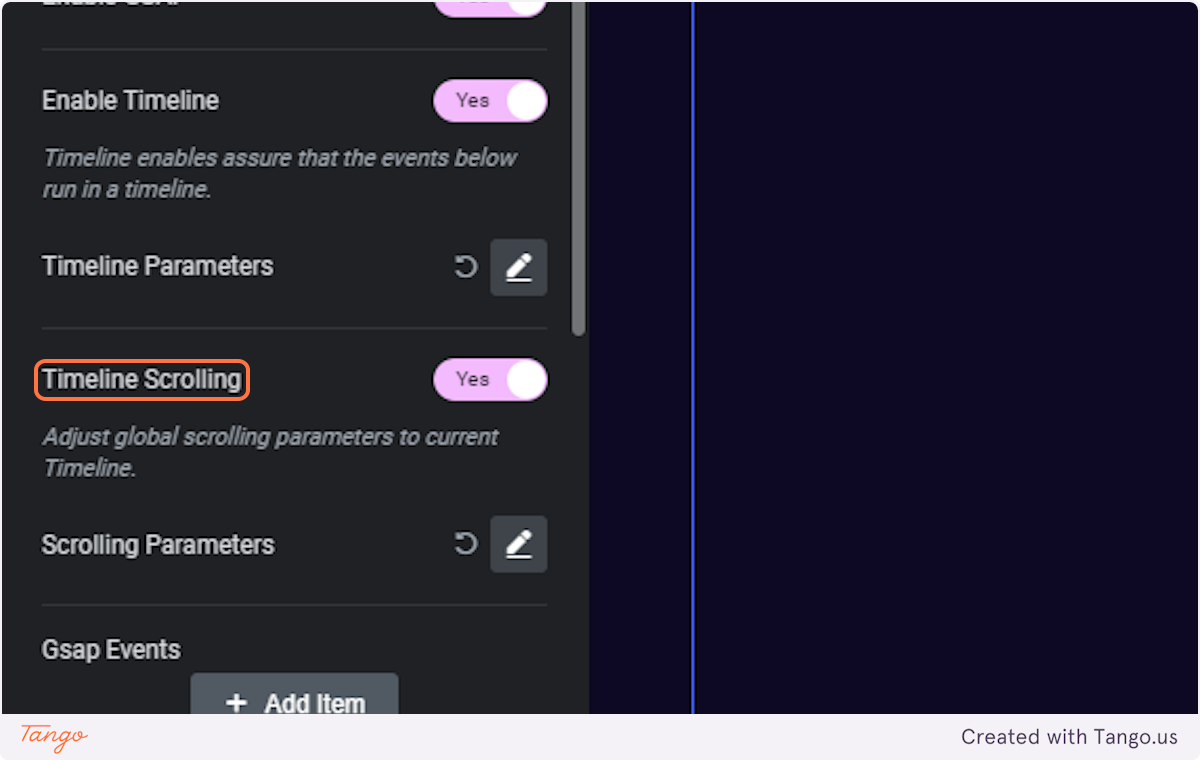
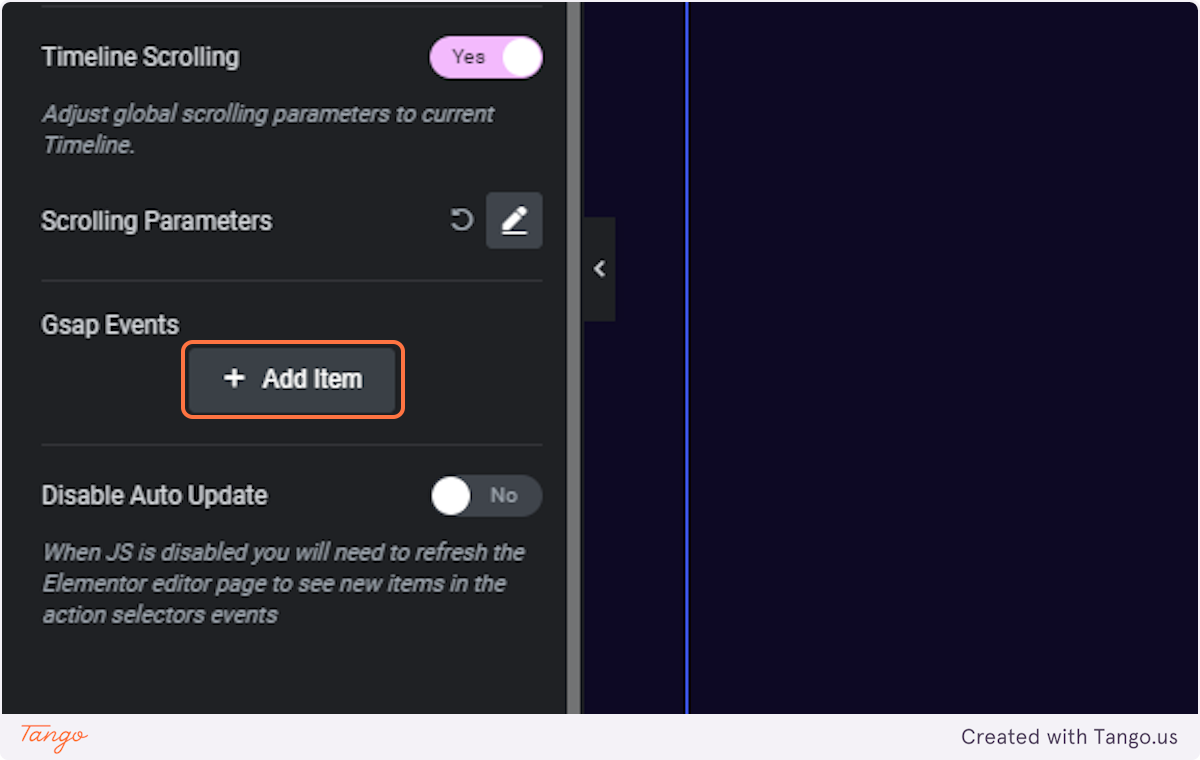
We then need to enable both Timeline and Timeline Scrolling. We don’t need to change any of the Timeline parameters to animate the 3D model as everything we need is already contained either in the base values or in Scene 1, and we’ll be working using the GSAP Events.
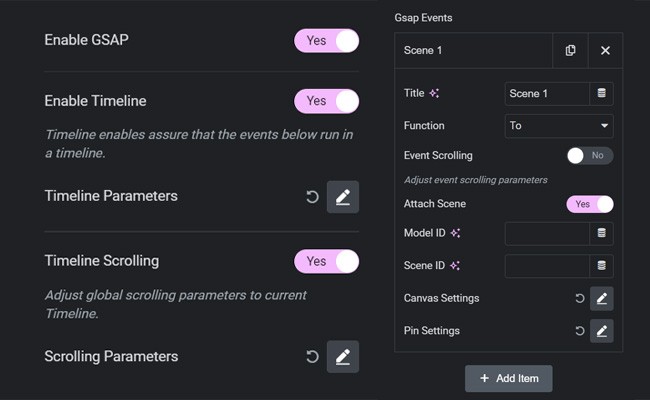
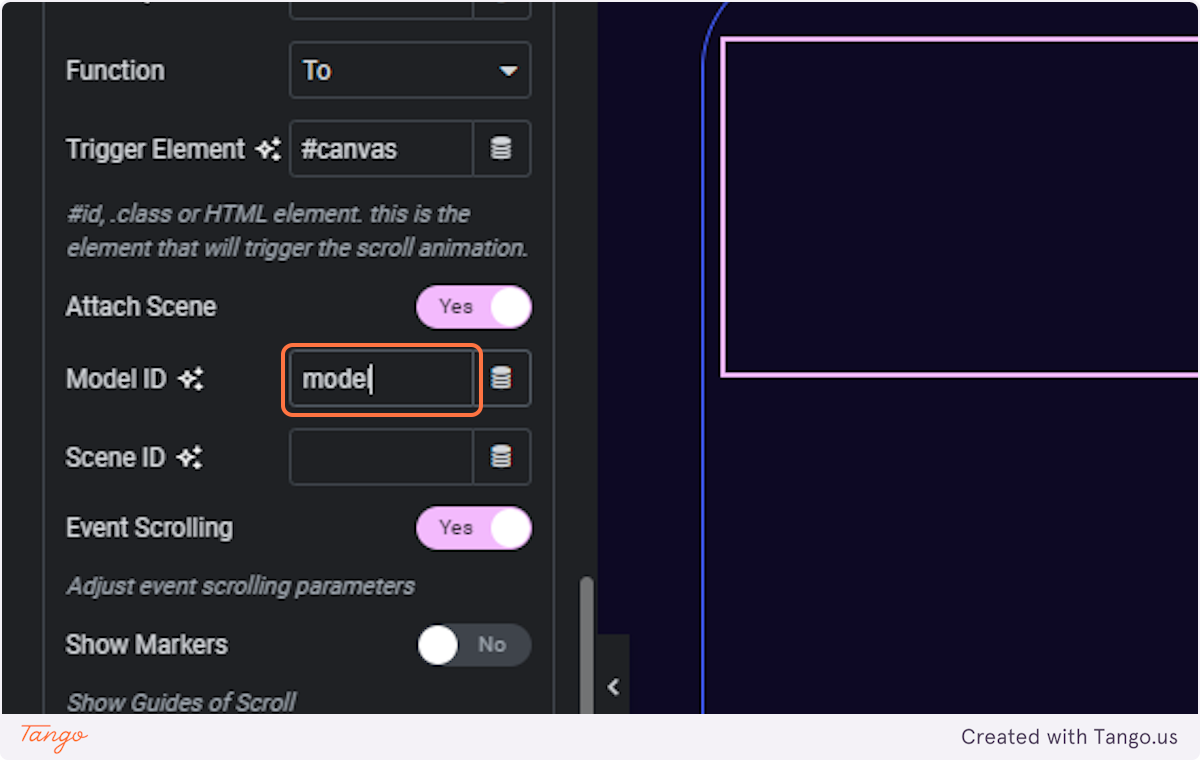
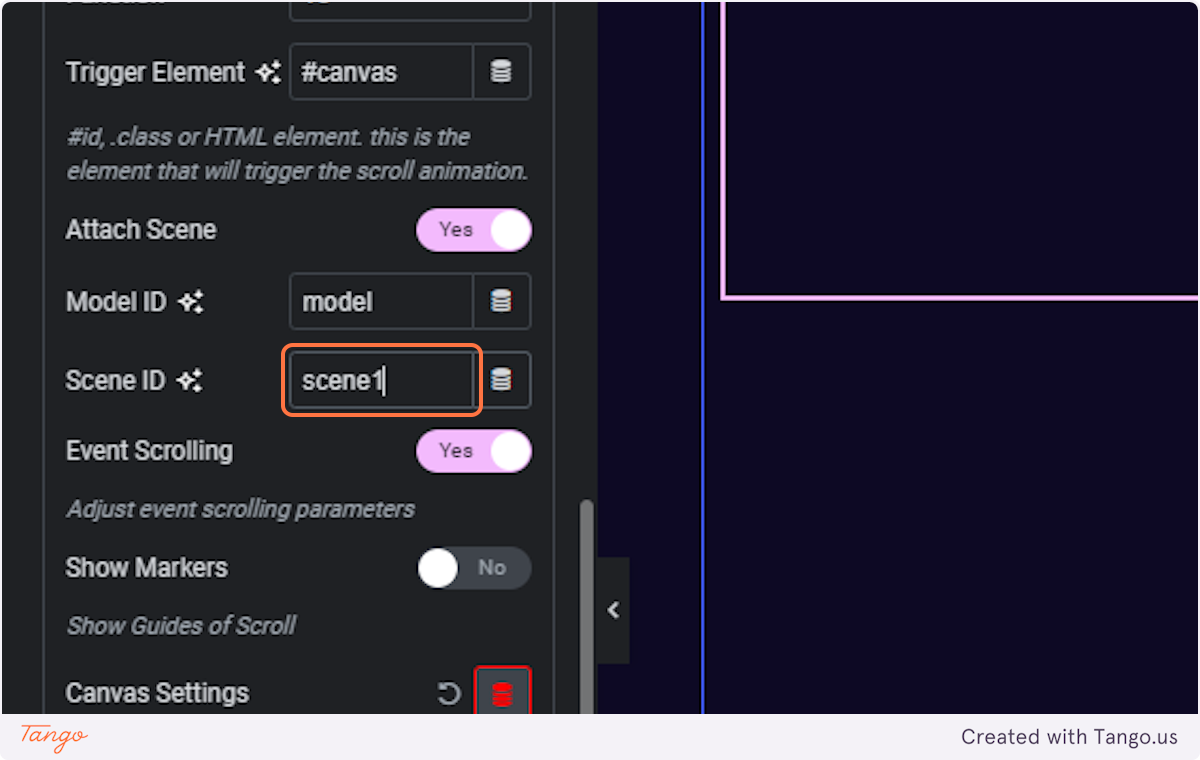
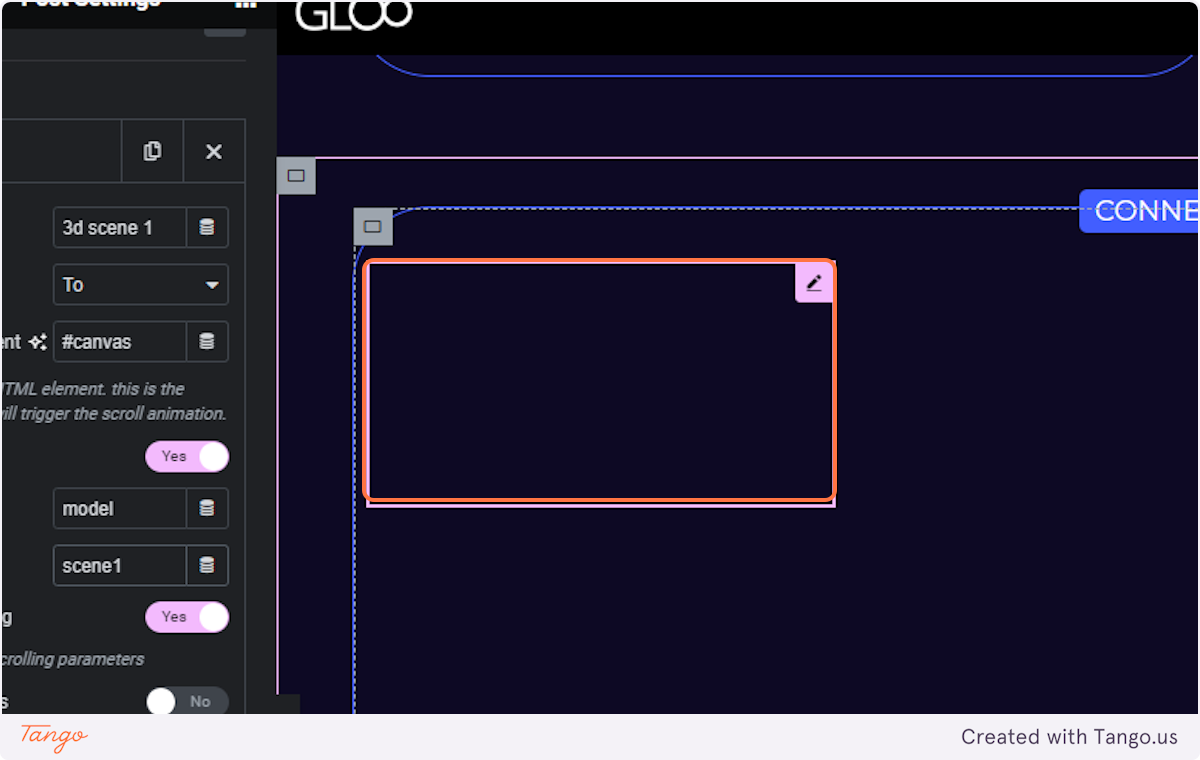
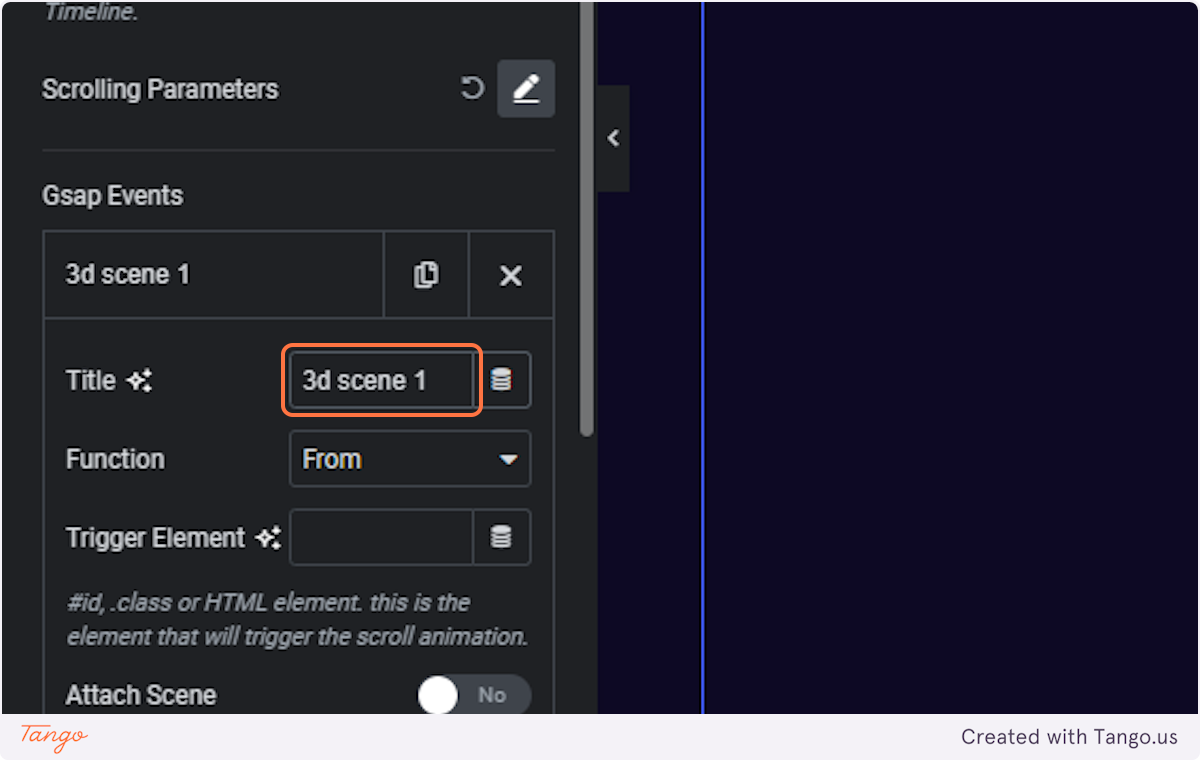
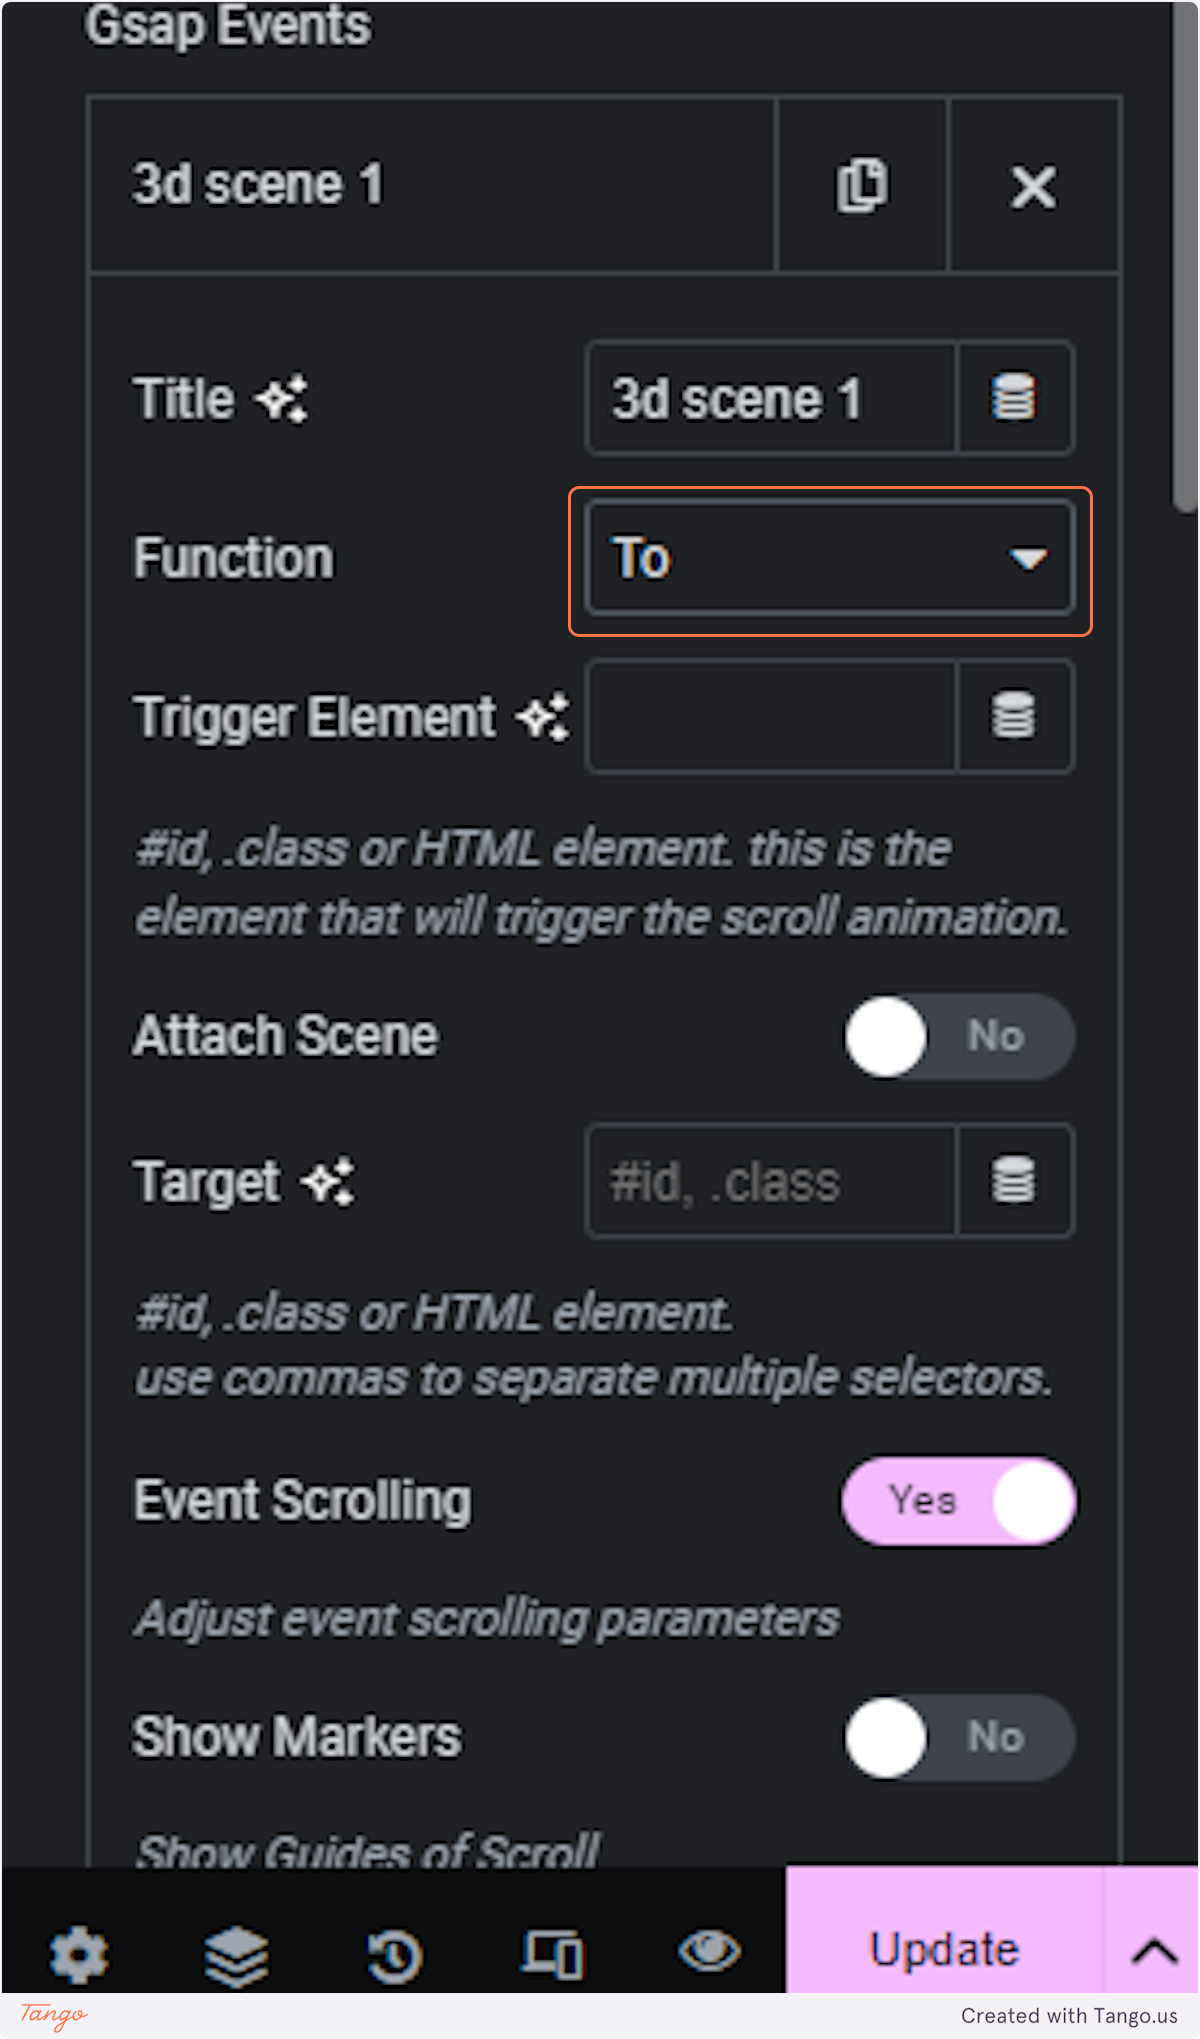
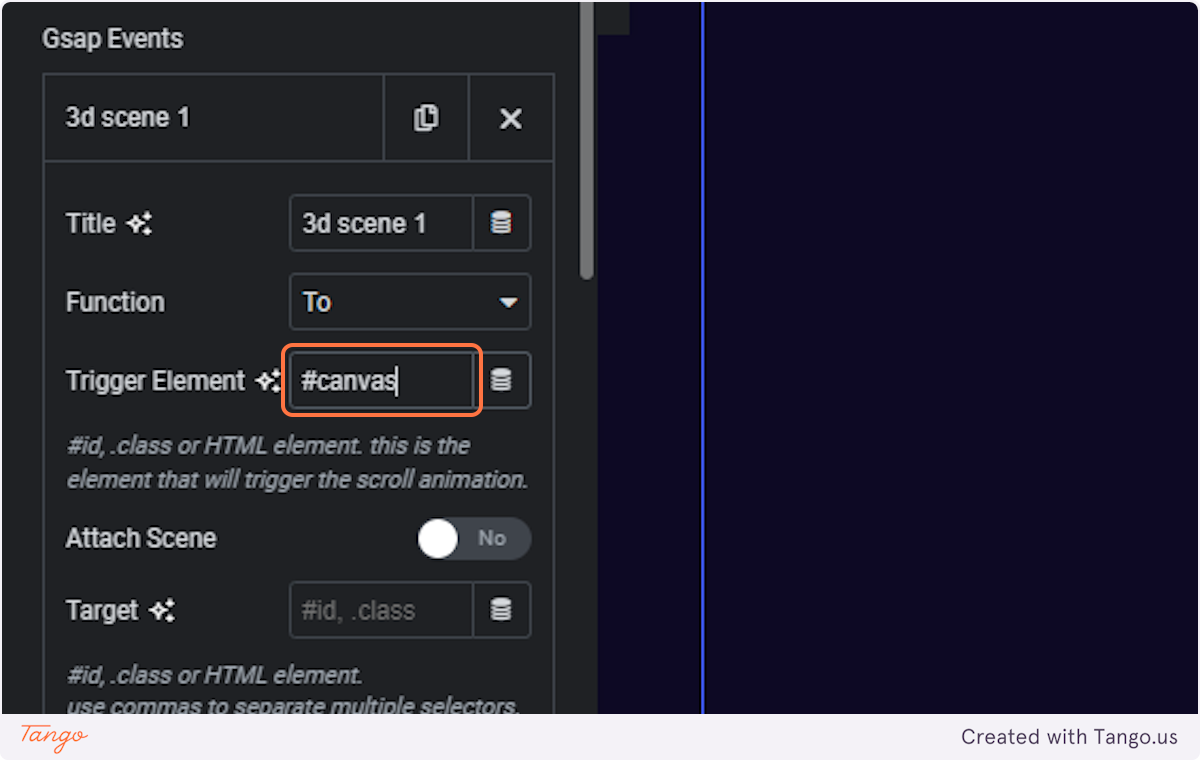
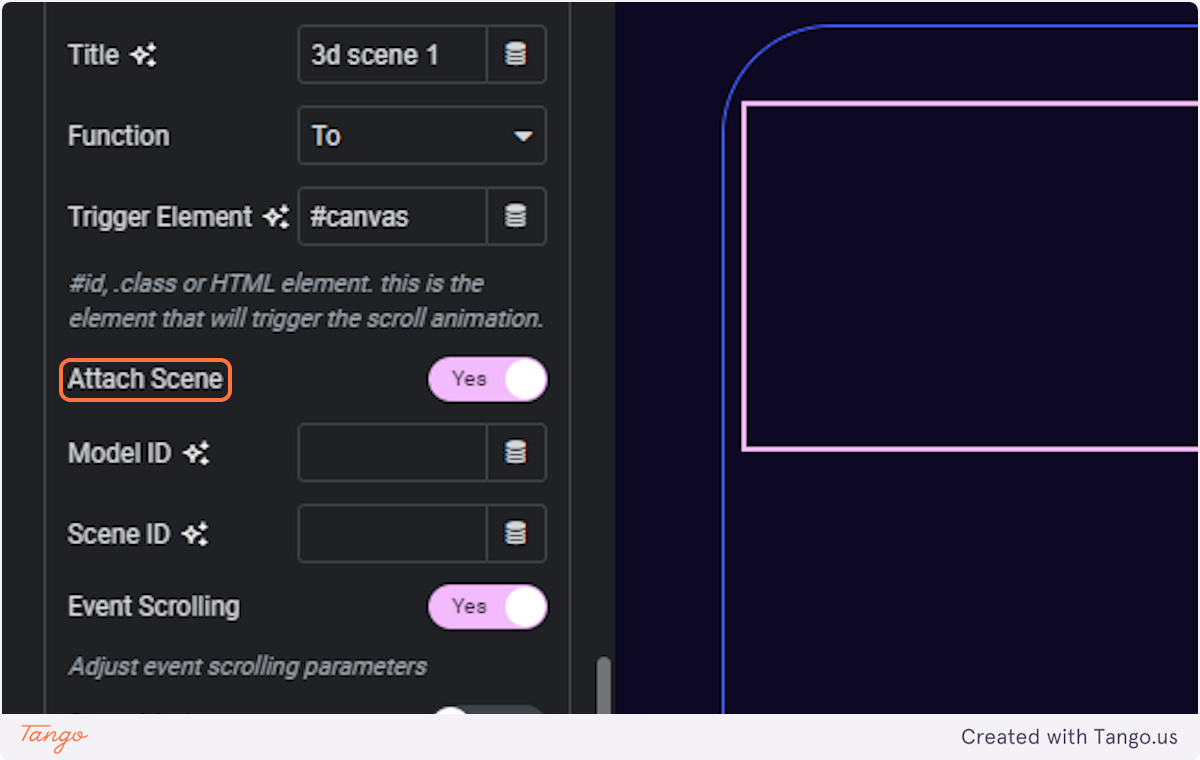
Let’s create the GSAP Event (tween) and give it a title, and set the Function to TO. This means that the values will move from the base values TO the Scene 1 values. Next step is toggling on Event Scrolling and setting up a trigger element, which is the CSS ID of the Container that contains the 3D Model Widget. Again, we can ignore all other settings here except for Attach Scene, which will need to be toggled on. This will simplify the GSAP Event menu.
We then need to specify the Model ID, which we’ve set before, and the Scene ID, which in this case is Scene 1. It’s suggested to toggle on Show Markers as well so that we can see what we’re doing. In the Canvas Settings, in order to make sure everything works right out of the box, we can set the default values of top top for Start, bottom bottom for End, and 1 for Scrub. In case we’re working with multiple GSAP Events (tweens), because we’ve set up more than one Scene in the 3D Model Widget, we need to keep in mind that we’re going to need to stack the animations using the start and end values in their respective canvas options. For example if we have four Scenes and four Events (tweens): Scene 1 will start at top top, but end at 25% bottom, Scene 2 will start at 25% top, and end at 50% bottom, Scene 3 will start at 50% top and end at 75% bottom, and Scene 4 will start at 75% top and end at bottom bottom. The percentages need to stack to 100% of the View Height of the Container in order to use all the available scrolling space.
The reason the Start and End fields need two values each to work properly is as follows:
The first value is the reference point on the ScrollTrigger’s Trigger element (like top, bottom, center, 25%, 50%)
The second value is the reference point on the viewport (like top, bottom, center, 25%, 50%).
For example, top center in the Start field means the animation will start when the top of the Trigger element hits the center of the viewport, and bottom center in the End field would mean the animation ends when the bottom of the trigger element reaches the center of the viewport.
The Scrub value of 1 will connect the animation with the page scrolling. With the field empty or a value of 0, the animation will simply run once the container is in view. With Scrubbing turned on using a value of 1, we don’t have to set up further scroll settings.
It’s important to keep in mind that the View Height of the Container with the 3D Model Widget will essentially control the speed of the scrolling animation. The higher the View Height, the lower the scrolling speed. By setting up further Scenes and GSAP Events, we can then chain multiple animations and have the 3d object follow the user as they scroll through the page.
You can find free to use GLB or GLTF 3D files to use with the 3D Model Widget here. Each main folder is a different 3D object, inside, find the GLTF binary, GLB binary or just Binary folder for each, where you’ll find files fully compatible with the Widget.


Please make sure all 3 features are enabled in the gloo admin settings page

Same as model id specified in the 3d widget
In Order for this effect to work you also need to change the widget position to Sticky (top) and turn on the “stay In column” Option