
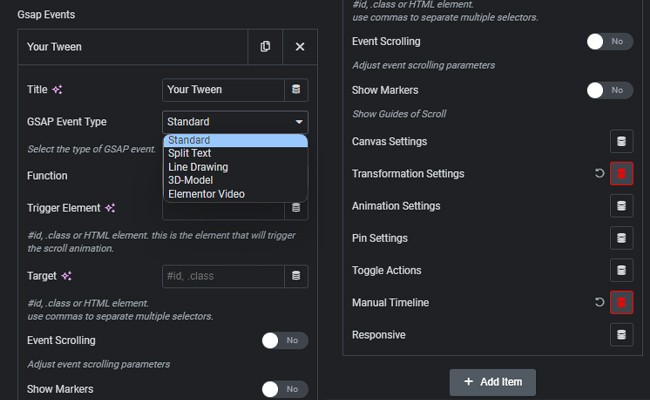
GSAP’s Standard Event is the baseline event for all of our animation needs. It can be used to target and animate any element on page in its entirety by manipulating the Transformation options using GSAP Scrolltrigger.
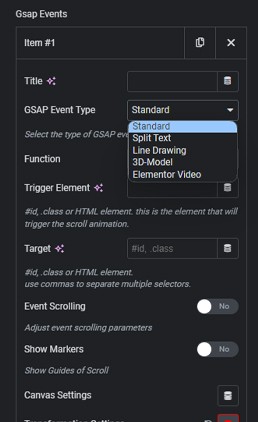
Other Event types should be used for more specific purposes: GSAP Split Text for animating single elements within text, GSAP Line Drawing for animating SVG strokes, GSAP Video Scrolling for mapping video playback to page scrolling, and GSAP 3D Model for animating with the 3D Model Widget.
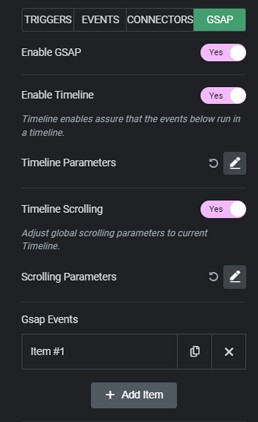
We will find GSAP ScrollTrigger in Power Gloo, and after toggling it on, it will appear in the Page Settings of your Elementor page, in the Interactor menu. It’s important to note that Interactor needs to be toggled on in the Gloo settings dashboard too for GSAP ScrollTrigger to work.
With GSAP Scrolltrigger turned on, we will see a multitude of options appear. The most important to get started are Timeline and Timeline Parameters, which will give us plenty of ways to fine-tune global parameters that will apply to our page. However, it’s important to note that these represent mostly fallback values if we’re working with tweens, which in Gloo are called GSAP Events.
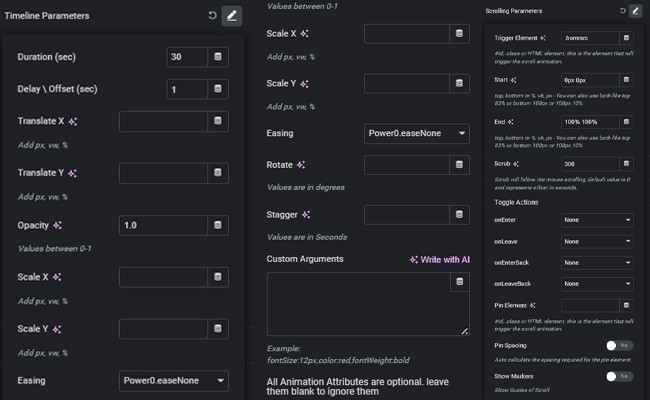
We will have the availability to set global Duration, Delay, Easing, and transformation options. These are not mandatory if we’re working with Events (tweens) but will be useful if we aren’t using Scrubbing: Scrub is defined as the connection between the animation and the mouse scrolling. Without a scrub value, animations fire by duration and delay, and will play or reverse as soon as the viewport comes into view inside the page.
Likewise, Toggle Actions represent unique behaviors that will fire according to User interaction with the viewport. These are:
This is the core of the GSAP ScrollTrigger, as this is where we define individual animations and chain them together using the repeater. With the Standard Event Type selected, the first and most important setting we find here is the Function. This can be either To or From. With To meaning that the animation will progressively change the values of the target to match the values we specify in the menus of each tween, and From meaning the exact opposite, with the specified values becoming the starting position rather than the arrival.
Inside Trigger Element we can paste the CSS ID of the Section or Container that we want to be the visual starting point of the animation as soon as it enters the viewport, or any valid class selector like .myClass, or HTML element, without a prefix. This is usually the container that contains the Target. The Target will be the ID of the image or element we want to animate. If we’re using IDs, it’s important to remember to have the # symbol before the rest of the letters.
It’s important to note that when using the GSAP Split Text and Line Drawing event types, special care needs to be taken into account for the target. In the case of Split Text, we will need to target the HTML tag of the widget (e.g. #text h2) and in Line Drawing we will need to enter an asterisk (*) to signify that the entirety of the content of that selector needs to be animated. (e.g. #svg *)
Attach Scene will let us animate using 3D objects with the help of the 3D Model Widget, for more information, check the 3D Model Widget Module Page.
Show Markers will show scroll guides which will let us see where our animations start and end.
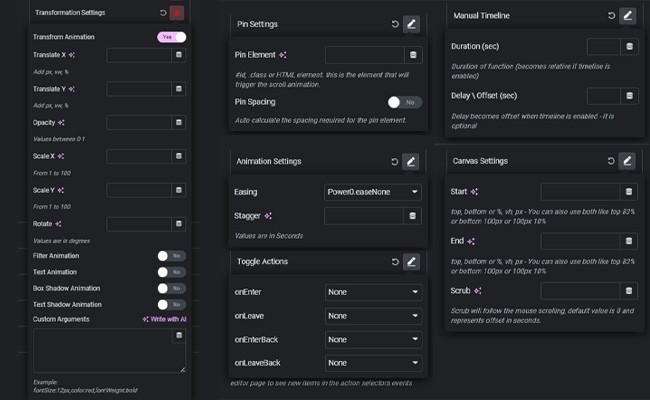
The Canvas Settings will let us define where the animation starts and ends relative to the position of the Trigger element within the viewport, along with letting us set the Scrub value. The unit of the value is in seconds, and an higher value represents more delicate scrubbing.
The Start and End fields need two values each to work properly. For example: Start at top top and End at bottom bottom. With either or both value being able to be replaced by any number expressed in percentage, for example 50%, or any other position, for example center.
The first value is the reference point on the ScrollTrigger’s Trigger element (like top, bottom, center, 25%, 50%)
The second value is the reference point on the viewport (like top, bottom, center, 25%, 50%).
For example, top center in the Start field means the animation will start when the top of the Trigger element hits the center of the viewport, and bottom center in the End field would mean the animation ends when the bottom of the trigger element reaches the center of the viewport.
Considering the first value always represents a reference point in the Trigger element, changing the Trigger element’s view height will determine how much scrolling needs to be done to actually carry out the animation. The more view height, the more scrolling we’ll need to do. We can fine tune the speed of the animation using this.
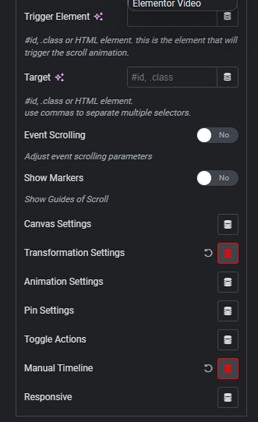
Moving forward, the Transformation menu will let us translate, scale, rotate and change the opacity of the Target element being animated, and we can add and control any CSS property we may want in the Custom Arguments field. Moreover, by using the toggles, we will have access to CSS Filter animation values, Text values like letter spacing, word spacing and line height, and Box and Text shadow values for our animation.
The Animation settings will let us select different kinds of Easing supported by GSAP. Easing functions specify the rate of change of each parameter over time.
We can also set a stagger value to create staggered animations which will work on multiple elements. By adjusting the value, we’ll be making each subsequent element finish its animation later than the first according to the chosen value. This creates a so-called stagger effect.
Pin Settings will let us pin the animation to a certain Target element once it appears, and the Manual Timeline will let us setup Timeline options if we aren’t using the global timeline values.
When we’re working with multiple GSAP Events or Tweens, it’s important to note that each one is its self-contained animation of a single object. This means that we can have different elements animating at the same time on screen or multiple subsequent animations on the page. Each individual Canvas setting for each tween will let us make sure that our animations keep a satisfactory delay between one another, if needed, by working with start and end positions. The Trigger element can be thought of as defining the canvas for the Target element.
However, sometimes we may want to have a multiple Targets to animate within a single Trigger section, container or HTML element. When that happens, we need to keep in mind that we’re going to need to stack the animations using the start and end values in their respective canvas options. For example if we have four Events (tweens): Event 1 will start at top top, but end at 25% bottom, Event 2 will start at 25% top, and end at 50% bottom, Event 3 will start at 50% top and end at 75% bottom, and Event 4 will start at 75% top and end at bottom bottom. The percentages need to stack to 100% of the View Height of the Container in order to use all the available scrolling space.
When working with many elements in the GSAP Event repeater, because of the way Elementor works, the editor might get slow. This is where the Disable Auto Update toggle comes into play. You will find this toggle at the end of the GSAP options. With this toggled on performance will improve but at the cost of having to refresh to see new items in the actions selectors events in Interactor.