Introducing FFmpeg.
FFmpeg is a powerful command-line audio and video converter available for Linux, macOS, and Windows. Installing it is essential for ensuring that your video of choice will be supported on all browsers when using GSAP Video Scrolling animations. We’ll need FFmpeg for this because some browsers like Chrome require specific video codecs for compatibility with GSAP.
In this guide we will outline two methods to achieve the desired outcome of converting our video to something that we can use with GSAP Video Scrolling on every browser, without any compatibility issues. The first method is the most straightforward and the easiest as it will allow us to do everything we need online, but the second method, while a bit more complex, will let us do everything locally, since we’ll be installing the program on our Windows machine.
This may come in handy if the first method becomes unavailable, or if we just want to have the ability to process many videos at our own pace and for other needs, since FFmpeg is always a good tool to have around.
Method 1: Use FFmpeg online to convert videos for GSAP.
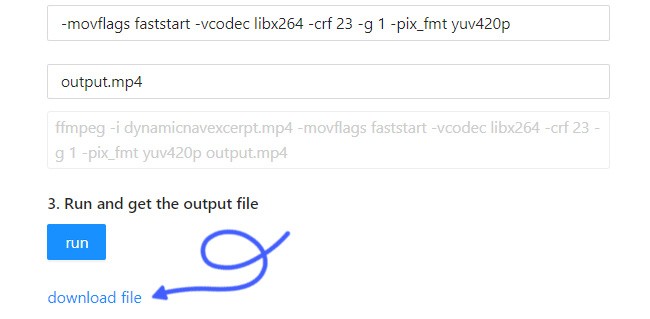
Simply navigate to the FFmpeg online utility, upload your video, rename the output if needed, and click Run. We’ve saved all the parameters you need in the link so that as soon as you click it, we’ll be ready to go. It should look like this:

In case the parameters haven’t carried over, we will just need to paste the following string in the Please enter output options field:
- -movflags faststart -vcodec libx264 -crf 23 -g 1 -pix_fmt yuv420p
As soon as we click Run the process will start. Once it finishes, a download link the processed video will be generated.
That concludes Method 1. We can now use this video for our GSAP Video Scrolling needs and it will be compatible with every browser.
Method 2: Install FFmpeg locally.
FFmpeg‘s installation is as simple as downloading the archive, even if the program doesn’t come with a GUI. However, we’ll also be adding FFmpeg to the Windows PATH, so that you can seamlessly run it from Command Prompt or PowerShell without needing to specify the full file path every time we want to convert a video.
Let’s first walk through the process of installing FFmpeg on Windows in four simple steps, and we’ll then see how to convert videos for GSAP with the local installation.
Prerequisites
Before we begin, make sure you have the following:
- A Windows-based system (This tutorial is demonstrated on Windows 11).
- A file archiver (ilke WinRAR or 7-Zip, or even the default Windows utility).
- Access to Command Prompt or Windows PowerShell with administrator privileges.
Step 1: Download FFmpeg for Windows
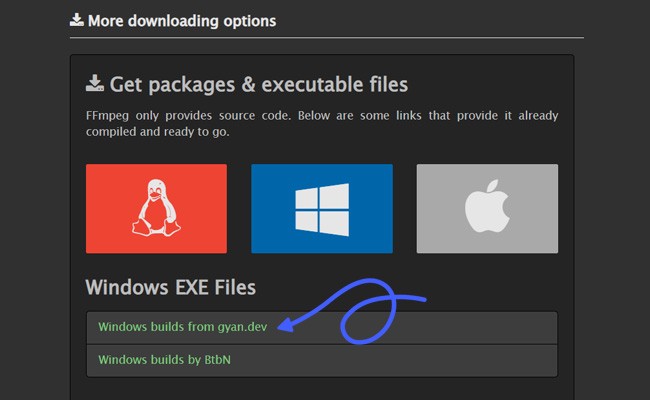
To get started, visit the FFmpeg download page and follow these steps:
Hover over the Windows logo and click the Windows builds from gyan.dev link to access the Windows download options.
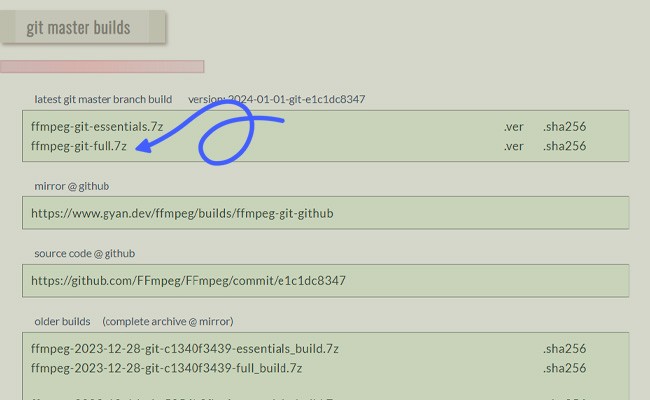
In the git master builds section, locate the latest FFmpeg build version and click on the ffmpeg-git-full-7z link to download the full build with up-to-date libraries.
Choose your preferred download location and save the file.
Step 2: Extract the Downloaded Files
Once the download is complete, proceed to extract the contents as follows:
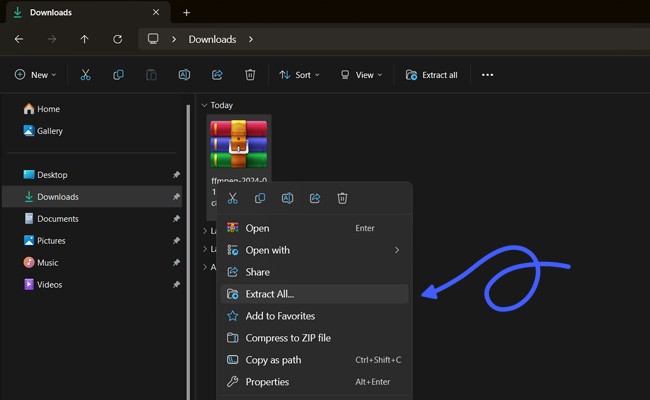
Locate the downloaded file, which is typically found in your Downloads folder if you haven’t specified a location.
Right-click on the downloaded file and navigate to extract all (or use your preferred file archiver).
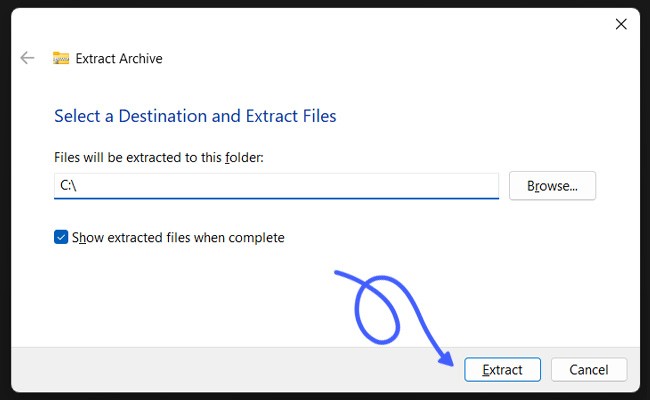
Then select a destination for your extracted files. We’ll be extracting to the root of the C drive for this guide.
After extraction, rename the extracted folder to FFmpeg or to anything that’s easy to remember.
This concludes the installation, as we are already able use FFmpeg from now on. However, if we stop here, we’ll need to specify the path to the executables in the Command Prompt or PowerShell windows every time we want to use it.
Step 3: Add FFmpeg to PATH
To ensure easy access to FFmpeg, we’ll add it to the Windows PATH environment variable. This will tell our computer where to find the program without having to specify the path, so that all we’ll need to do is write “ffmpeg” in Command Prompt or PowerShell to run the program.
Begin by searching for System Variables in the Taskbar and select Edit the system environment variables from the results.
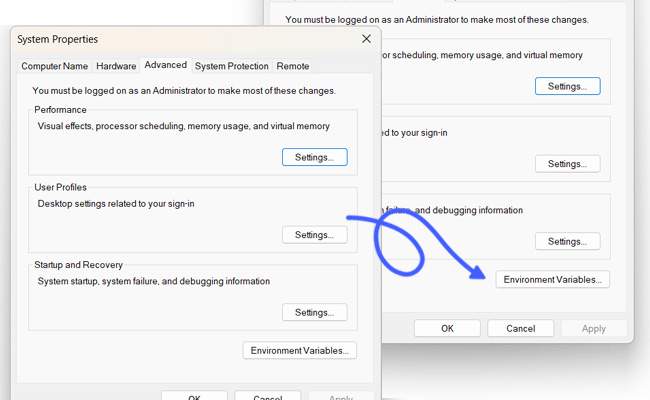
In the System Properties window, under the Advanced tab, click the Environment Variables button.
In the User variables section, locate Path and click the Edit button.
Click New in the side menu and add C:\FFmpeg\bin to the empty field, or your chosen path for the bin folder inside the FFmpeg folder. Confirm your changes with OK.
This addition to the PATH variable allows you to access FFmpeg from the command line by simply writing “ffmpeg”
Step 4: Verify FFmpeg PATH
To confirm that FFmpeg has been successfully added to the Windows PATH, open Command Prompt or PowerShell and run the following command: ffmpeg
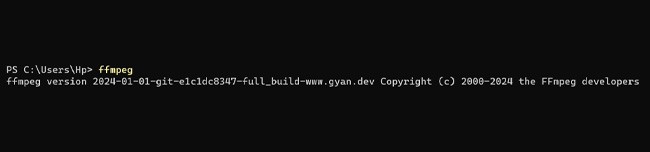
The output will confirm that everything is working as intended, and that we can move on to convert videos for usage with the GSAP Video Scrolling feature.
Converting videos locally for GSAP Video Scrolling.
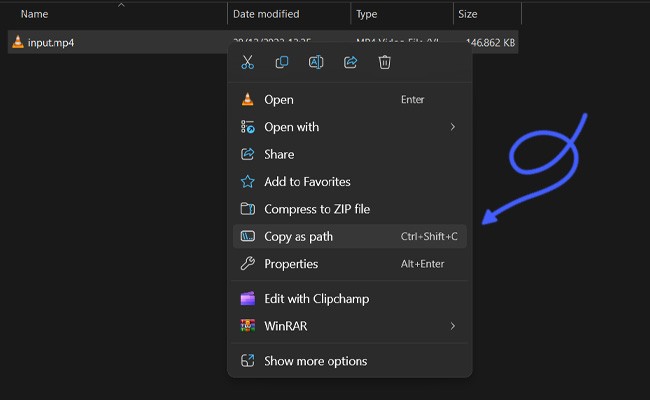
With the more difficult part behind us, conversion is as easy as pasting a single line into your Command Prompt or PowerShell. Make sure your video is already optimized as to not impact site performance too much, and place it in a folder of choice. Then simply right click it, and click on Copy as path.
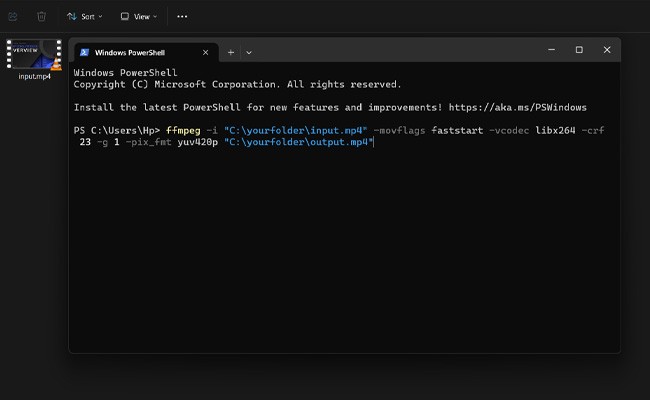
This will tell FFmpeg where to find the video to convert. We can now open Command Prompt or Windows PowerShell and paste the following command:
- ffmpeg -i input.mp4 -movflags faststart -vcodec libx264 -crf 23 -g 1 -pix_fmt yuv420p output.mp4
Where input.mp4 needs to be replaced with the path we’ve just copied, and output.mp4 can be replaced by any other path, though we suggest to use the same path and simply rename the file. This will create a new video in the specified folder. So the final command will look something like this:
- ffmpeg -i “C:\yourfolder\input.mp4” -movflags faststart -vcodec libx264 -crf 23 -g 1 -pix_fmt yuv420p “C:\yourfolder\output.mp4”
Pressing Enter will start the conversion process if the paths have been correctly pasted in.
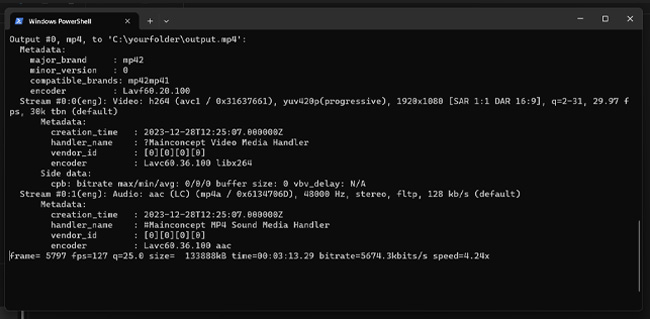
Once the process has finished, which will take some time depending on the size and duration of the video, we will see a new file, in this case output.mp4, in the specified folder.
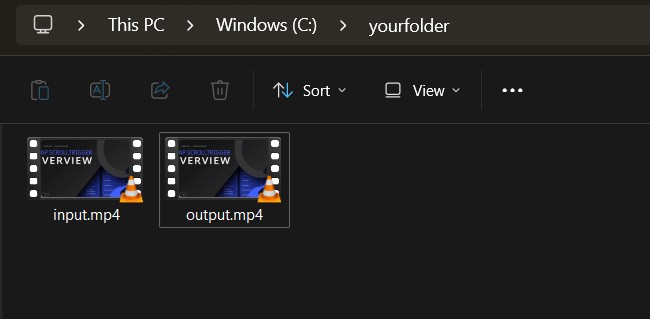
The converted video is now ready to be used with GSAP Scrolltrigger and will work with GSAP Video Scrolling on every single browser! This whole process might seem a bit daunting at first, but we promise that once installed, and with very little practice, converting videos will never be as fast or straightforward using any other utility.